How to Aim High-Beam Headlights for Safety Driving
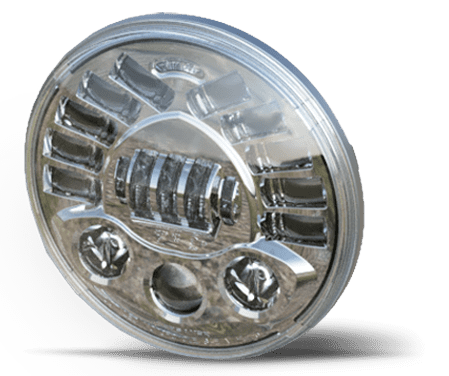
J.W. Speaker headlights are designed to provide maximum visibility and safety on the road.
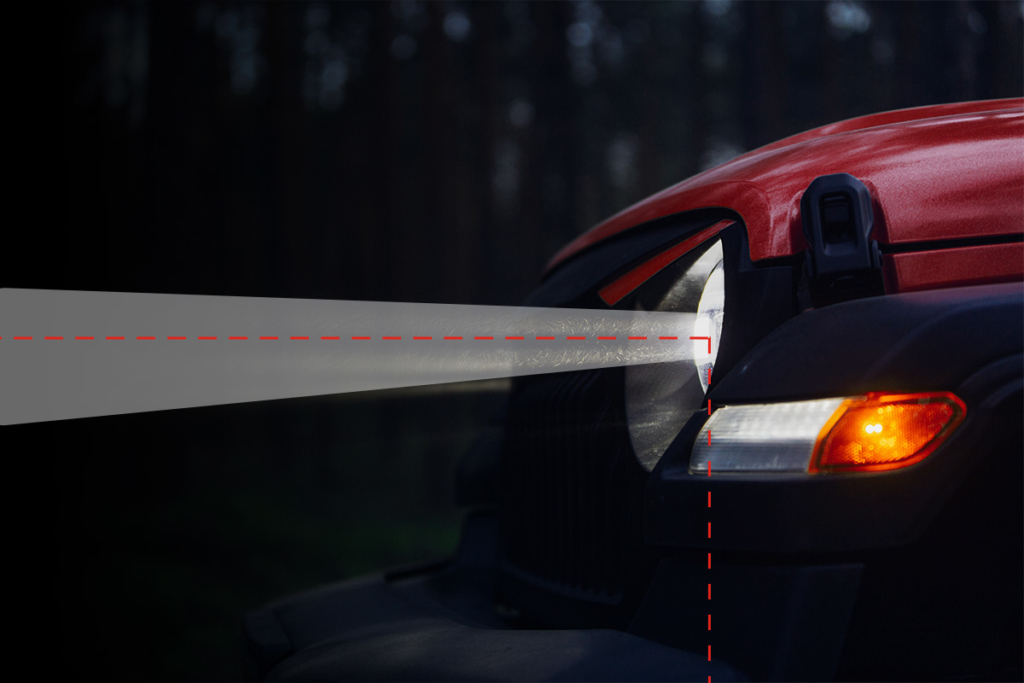
Properly configuring your vehicle’s high beam headlights is essential for safe driving. Taking the right steps to adjust them appropriately can guarantee maximum visibility on roads and promote a secure driving experience. Follow our step-by-step guidelines for how to aim headlights properly when installing driving beams or high beam only headlights.
We recommend that headlights are aimed with a headlight aiming system for proper alignment. If you are not familiar with the legal requirements for aiming headlights, please see a professional service provider.
How to Aim Headlights—Before Installation
We recommend getting your workplace ready before installation.
1. Vehicle is being aimed on a level surface.
2. All tires are properly inflated.
3. Vehicle is at normal driving height (applicable to listed vehicles).
NOTE: If a lift kit is added or removed from the vehicle, headlights MUST be AIMED AGAIN.
Required Supplies:
-
Tape or chalk to mark lines
-
Corresponding tools for your vehicle's aiming mechanism
Optional Supplies:
-
Laser level to expedite the aiming process and will help to increase accuracy in aiming
Key Terms for Aiming High / Low or Low Beam Headlights
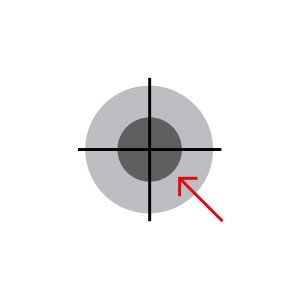
Hot Spot
The top of the pattern that is the cutoff when aimed at a wall.
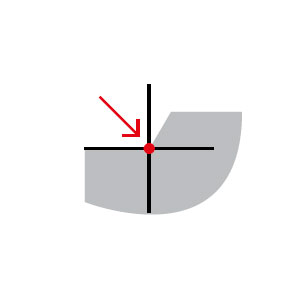
Alignment Point
The center of the angle in the Kink that must align to the center point when aiming the light at a wall.
Guidelines for Aiming HIgh Beam Headlights
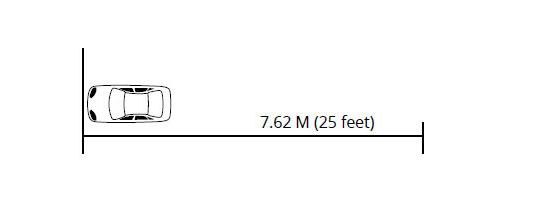
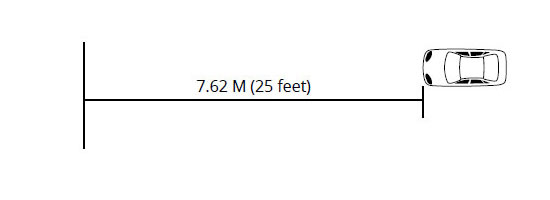
Park your vehicle close to a wall, in an area where there is at least 7.62 meters (25 feet) of space behind it (excluding the car length).
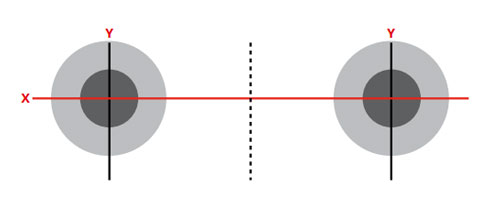
On the wall, draw a line from the ground to the approximate center point of the headlight. Repeat for the other headlight. This will create your y axis lines.
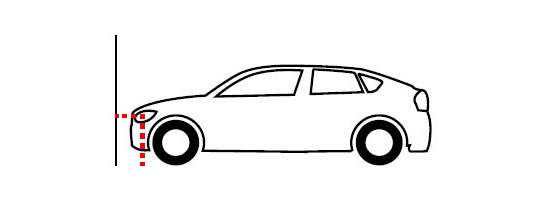
Connect the center points between headlights in a straight line, using chalk or tape. This will create your X axis (horizontal) line.
NOTE: Use a straight edge and a level to make sure this line is straight.
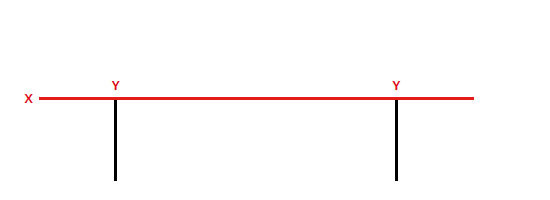
Extend your vertical, Y (vertical) axis lines up approximately 3 feet. Your lines should match the diagram below, when looking at the lines straight on.
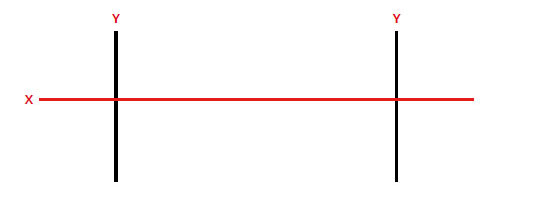
Reverse your vehicle in a straight line so that the front of the headlights are 7.62 meters (25 feet) back from the wall.
The goal of these instructions is to aim BOTH of your headlights so that the center of the Alignment Point is at the cross section of the horizontal X and the Vertical Y lines you have drawn. The following directions illustrate the process for proper aiming of headlights.
When you first turn on your vehicle after installing your headlights, the Alignment Points may be positioned differently than shown and will likely be aimed differently from each other.
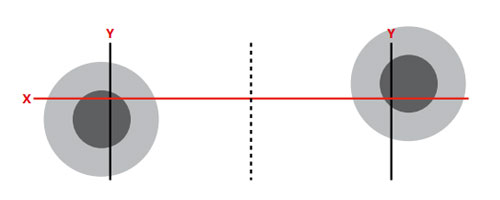
Using the alignment mechanisms in your vehicle, adjust one headlight vertically until the Alignment Point is even with the X axis.
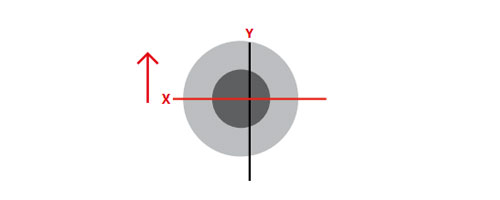
On the same headlight, adjust horizontally until the Alignment Point is even with the Y axis.
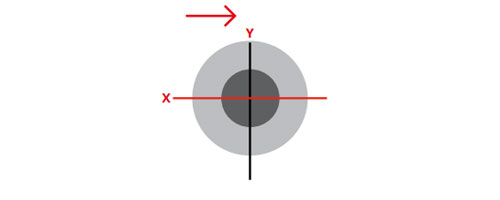
Repeat this process on the other headlight. Both headlights should match the diagram below, where the Alignment Point is even with the point where the X and Y axis crosses.
Download a PDF copy of our Headlight Aiming Instructions
If you are not familiar with the legal requirements for aiming your headlights, please see a professional service provider. Failure to properly aim your headlights is a risk to other drives and could result in tickets or citations with local authorities. J.W. Speaker is not liable for any damage to the vehicle or light, or any tickets/citations as a result of using these guidelines.
About J.W. Speaker
J.W. Speaker is focused on developing innovative, high-performance vehicular lighting solutions for OEM and aftermarket customers around the world. Specialized in LED and other emerging lighting technologies, J.W. Speaker is proud to design, manufacture and assemble products in Germantown, Wisc. For more information, contact J.W. Speaker at (800) 558-7288 or news@jwspeaker.com.

